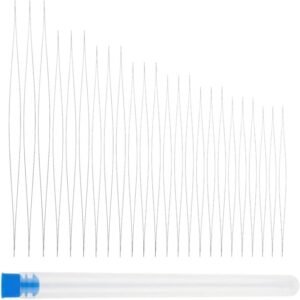
Recommended Tools

🧰 Recommended Beading Tools: Essentials and “Makes-Life-Easier” Favourites

Whether you’re just getting started with beading or you’ve already got seed beads in your carpet (we’ve all been there), the right tools make all the difference. Below is my go-to list of essential tools — plus a few “nice-to-haves” that make the process smoother, faster, and way more fun. I complied this list after months of buying the wrong tools and finding out the hard way.

Disclaimer: Some of the links in this post are Amazon affiliate links. That means if you click through and make a purchase, I may earn a small commission at no extra cost to you. It helps support the site (and my bead addiction).

✨ Shop my favourite tools here → Amazon Favourites Link

💎 The Essentials

1. Beading Mat or Board

A soft beading mat keeps your beads from rolling away and saves your sanity. If you want more structure, a bead board with measurements helps plan necklace or bracelet layouts before you start stringing. I use2 boards. A large beading mat and a smaller necklace u-shaped board. Both are used for different types of projects.

Why you need it: Prevents chaos, helps with symmetry, and stops beads from escaping into the carpet. Helps you set out and modify your designs. The lid on the u-shaped board is great for when I have to leave a project half completed.

2. Beading Needles

A must for fine seed bead work or detailed designs. I recommend a mixed pack (sizes 10–13) so you’ve always got the right needle for different bead holes.
Pro tip: Always have spares. They bend faster than you’d think.
👉 Shop Beading Needles on Amazon

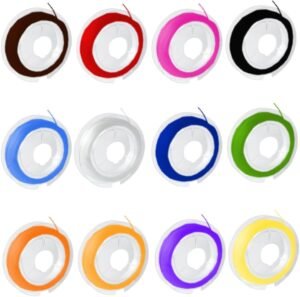
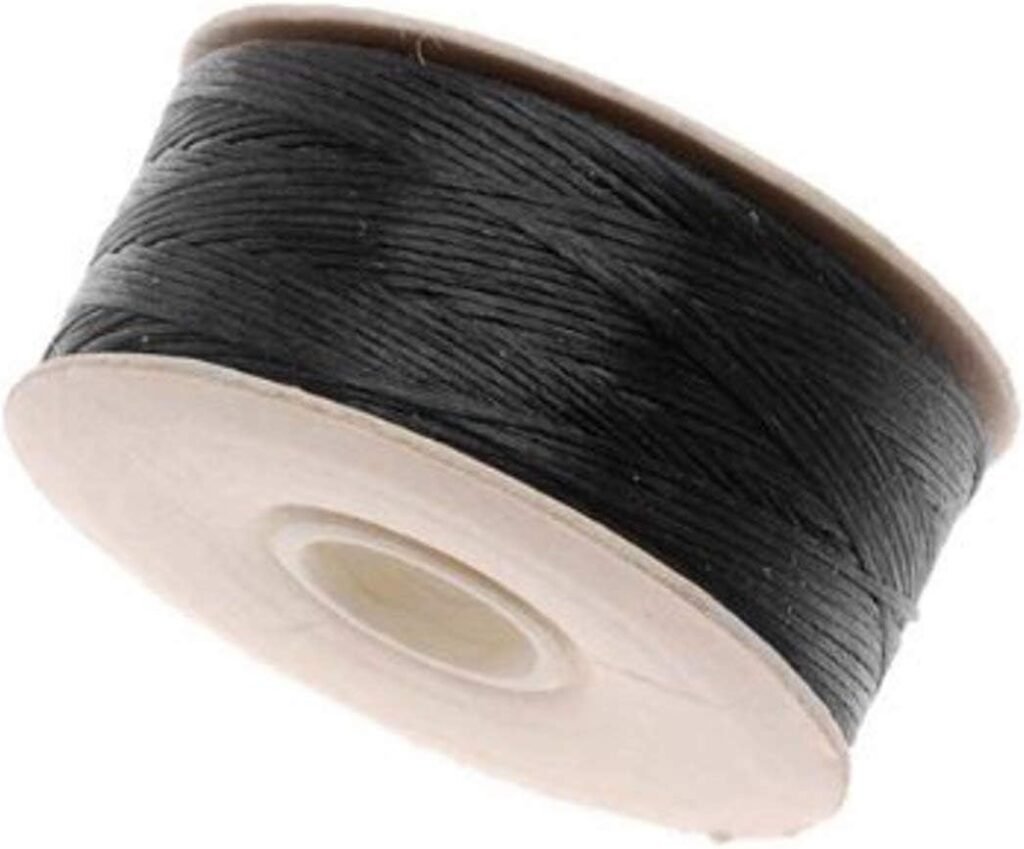
3. Bead Thread or Wire

I have spent hours recreating projects because I didn’t use the right thread or wire.  I also found it super confusing to watch overseas tutorials and not be able to source the correct thread or wire.

The considerations you need to make are durability vs drape vs elasticity. FireLine or WildFire for durability, Nylon Thread (Chinese knotting cord) thread for flexibility. Choose depending on your project — stiff materials like FireLine are great for structure, while Nylon beading thread gives a softer drape.

Also super confusing is the thickness and finding out what you brought won’t fit through your selected beads.

Here is a starter setup for a beader on a budget. 

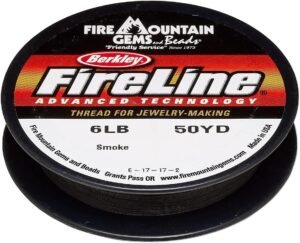
🧵 1. FireLine (braided fishing line)

Best all-rounder for bead weaving, especially with crystals and glass beads.

  • Size to start with: 6 lb / 0.006 in (≈0.15 mm)
  • Why: Thin enough for most seed beads (down to size 11/0) but still strong enough for heavier pieces or multi-passes through small holes.
  • You will use a lot of this so don’t be scared to buy a bigger roll.
  • Tip: Smoke Grey is less visible through beads than Crystal Clear.

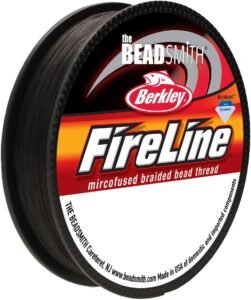
Optional second FireLine size later: 8 lb (0.007 in) for heavier or larger beadwork (6 mm+ glass, crystals, or heavier designs).

💡 Budget bonus: if you can afford one extra spool, make it FireLine 8 lb—it’ll last forever and handles nearly anything from seed beads to gemstone bracelets.


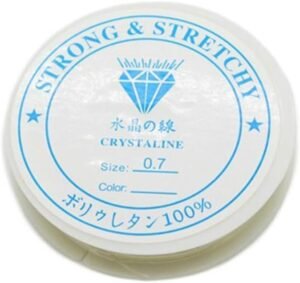
🪢 2. Elastic stretch cord

For bracelets and quick projects without clasps.

  • Size to start with: 0.7 mm (or 0.8 mm if most beads have big holes).
  • Why: The 0.7 mm fits through most standard bead holes (6–8 mm round beads, crystals, pearls) yet is durable enough not to snap easily.
  • Pro tip: Use clear elastic like Stretch Magic or Beadalon Elasticity and always pre-stretch before knotting. It is important you use jewellery stretch cords

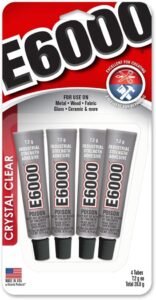
Optional upgrade: a small tube of E6000 Bead Glue to secure your knots. I prefer to buy mini tubes. Note: not super-glue as it makes knots brittle.


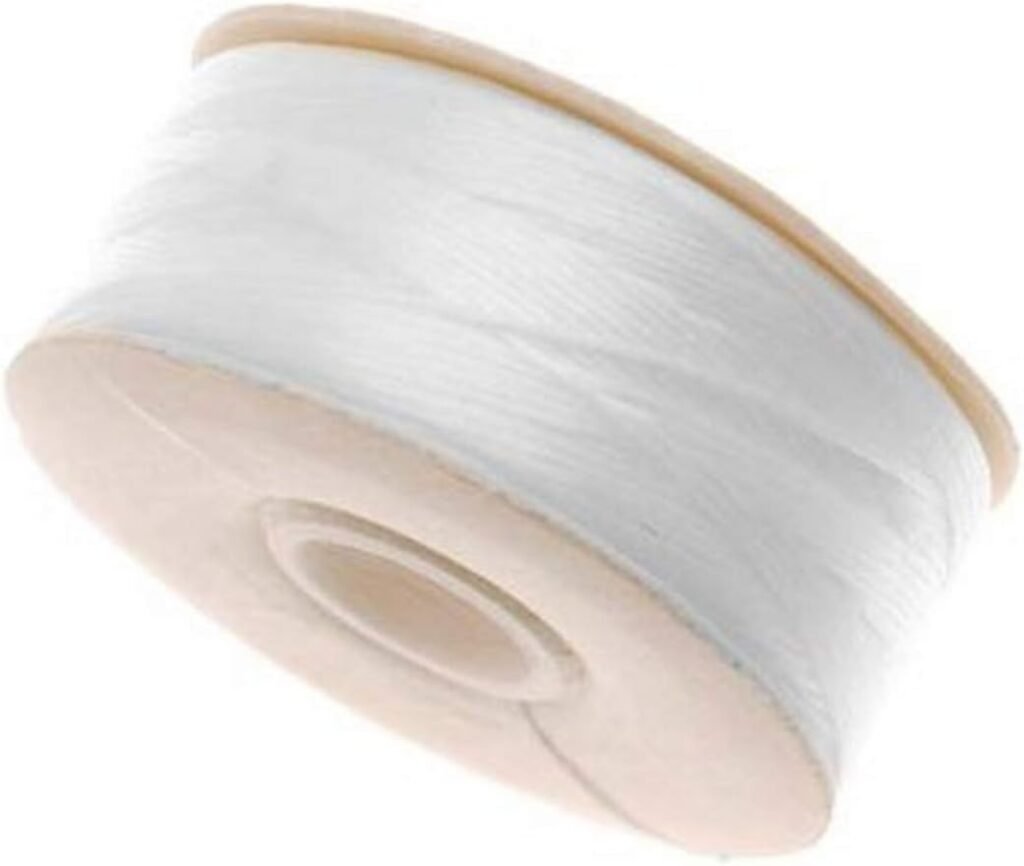
🧶 3. Nylon beading thread (for stringing or bead embroidery)

Great for lightweight projects and bead embroidery on fabric or leather.

  • Size to start with: Size D (0.30 mm)
  • The size D (0.30mm) when searching is very important, especially if using seed beads in your work.  Many online listings fail to mention the diameter of the thread.
  • Why: Flexible, smooth, and easy to wax for strength. Works with seed beads, pearls, and gemstone beads.  Note you can buy thread pre-waxed.
  • Alternatives: Nymo D, C-Lon D, or Superlon D.
  • If you want one multipurpose spool: go for C-Lon D in white 


4. Scissors or Thread Snips

You’ll want sharp ones — not the pair you use for wrapping paper. Precise cuts prevent fraying and save you from pulling half your design apart later.

There are many options for these. Close a pair that are going to feel good in your hands (you use them a lot).

Pro tip: Keep a backup pair that only touches beading thread. NOTE: Don’t use the wire flush cutters for this.

5. Pliers Trio (Chain-Nose, Round-Nose, and Cutters)

The holy trinity of beading. Chain-nose pliers for gripping, round-nose for loops, and flush cutters for clean wire cuts.

Best buy when starting out is a kit that contains the key tools you need. 

Nice option: Go for cushioned handles if you bead for long sessions — your hands will thank you.

💎 The “Makes-Life-Easier” Tools
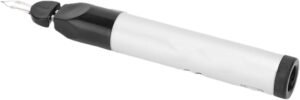
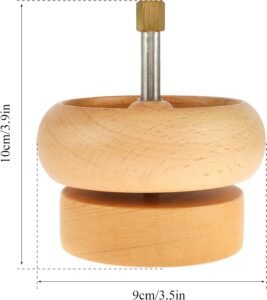
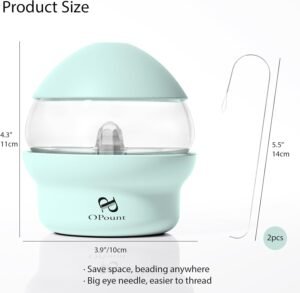
6. Crimping Tool

Sure, you can squish crimps with pliers, but a crimping tool gives you a professional, rounded finish that looks neater and lasts longer.
Result: Your pieces look more polished (and don’t fall apart).

🔹 Standard Crimping Tool

This is the classic two-step style most people start with.

How it works:

  • Step 1: The back notch folds the crimp into a tight “U” shape around the wire.
  • Step 2: The front notch rounds it out so it looks neater.

Result:
A small, slightly flattened oval crimp that securely holds your beading wire.
It’s reliable and works with both regular and tubular crimps.

Best for: Beginners, general jewellery making, standard 2×2 mm crimps.
Look: Neat but visibly crimped.


🔹 Magic Crimper (aka Magical Crimp Forming Tool)

This one’s the fancy cousin. It doesn’t crush the crimp — it forms it into a little metal bead.

How it works:

  • You use tiny 2×2 mm round tube crimps.
  • Instead of folding, the jaws have rounded cavities that press from four directions.
  • After a few squeezes (rotate between them), the crimp turns into a perfect little round bead that looks like part of the design.

Result:
Polished, professional look — no need to cover with a crimp bead.
Holds well if used correctly, but only with the right size tube crimps.

Best for:
Designers who want a seamless finish or minimalist look.
Look: Crimp disappears into the design — elegant and tidy.

7. Bead Scoop or Triangle Trays

These little trays make bead sorting, counting, and cleanup so much easier. Perfect if you’re using multiple colours or sizes.
Small joy: Pouring beads back into the container without spilling them. Bliss.

8. 6-Step Bail Making Pliers

If you struggle to make professional closed loops, then this is a great tool to have. Not essential because the experienced beaders make it look effortless. I found it helpful as it can make verious sized loops.

9. Magic 1 Step Looper

Another of the nice to have but not essential. Honestly if you are making zillions of closed loops this is a wonderful tool to have.  Comes in 3 sizes but the middle sized 2.25mm is the most useful.

10. Wire Straightener

They make it look easy on YouTube just straightening the wire with their hands. Yeah sure! I love this tool.


11. Thread Zapper or Burner

For melting and sealing ends on FireLine or synthetic thread. Way cleaner (and safer) than using a lighter.

Comes in battery or usb(rechargable) models


Safety note: Keep it away from flammable surfaces. Yes, I learned that the hard way.

12. Bead Spinner

A bead spinner is a nifty tool that makes threading tiny seed beads fast and frustration-free.

It uses a spinning bowl (manual, USB, or electric) that twirls your beads while you dip a curved needle in — the motion makes beads practically jump onto the needle.

Why use it:

  • Saves heaps of time on long strands or bead mixes.
  • Reduces hand strain and eye fatigue.
  • Great for stringing seed beads, heishi beads, or bead crochet prep.

Types:

  • Manual: Spin by hand — quiet and portable.
  • USB/Electric: Perfect for large projects or lazy days — consistent speed, zero effort.

💡 In short: it’s the beader’s secret weapon for speed, sanity, and symmetry. However not useful if you like to make repeating patterns.

Note: this isn’t a video of either of the bead spinners linked. It is for demonstrative purposes only.

💬 Final Thoughts

Investing in quality tools means fewer frustrations, cleaner finishes, and more joy in the creative process. Start with the essentials, then add the extras as your projects evolve.

Beading isn’t just a hobby — it’s therapy with sparkle. ✨